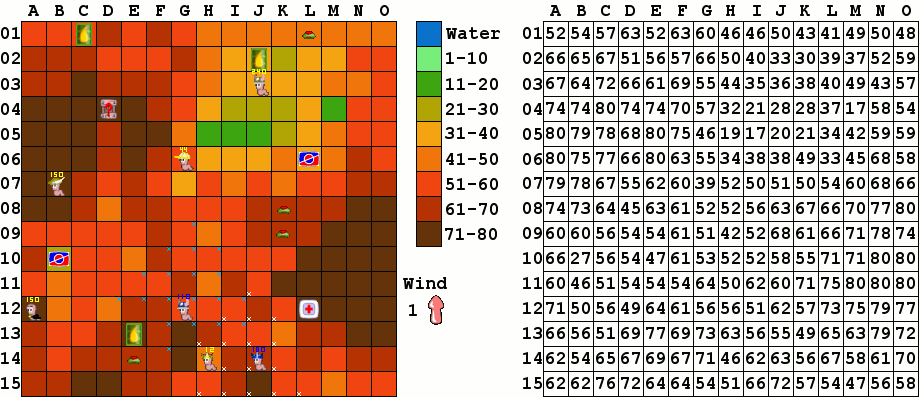
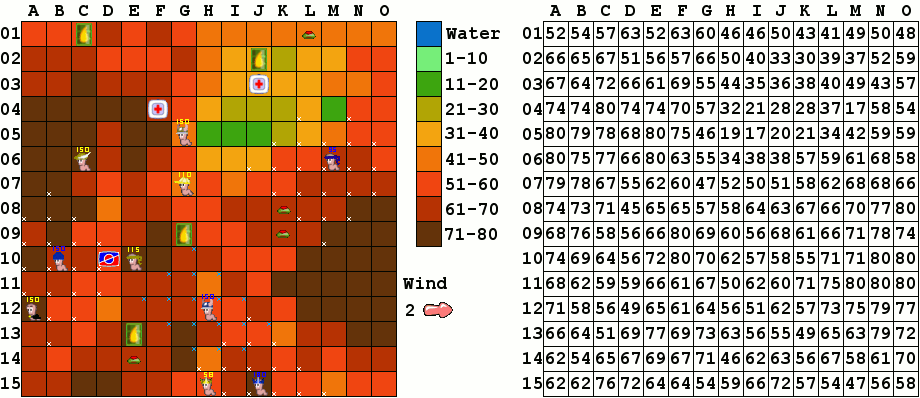
| Plasma (Yellow) | robowurmz (Blue) | |
| Handgun x Inf Prod x Inf Bazooka x5 Grenade x9 Shotgun x2 Fire Punch x3 Mine x2 Dynamite x2 Air Strike x3 Homing missile x7 Holy Hand Grenade x1 Ninja Rope x3 Fast Walk x1 Bubble Trouble x2 Teleport x2 | Handgun x Inf Prod x Inf Bazooka x 5 Grenade x 5 Dynamite x 2 Holy Hand Grenade x1 Ninja Rope x 3 Teleport x 1 |

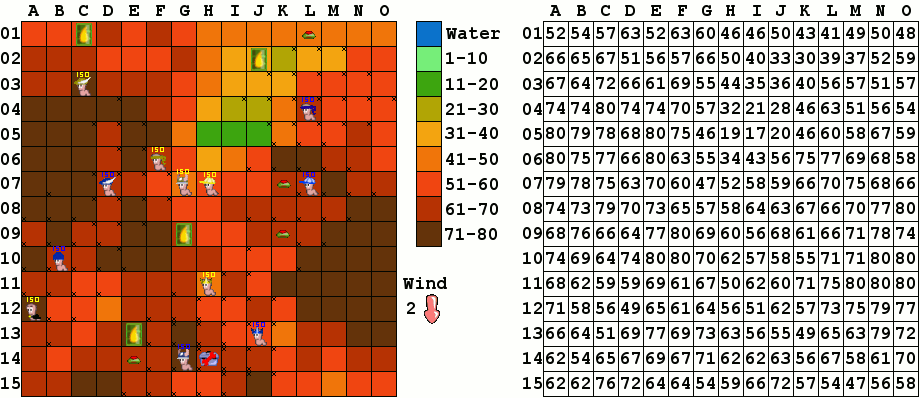
| Plasma (Yellow) | robowurmz (Blue) | |
| Handgun x Inf Prod x Inf Bazooka x5 Grenade x9 Shotgun x1 Fire Punch x3 Mine x2 Dynamite x2 Air Strike x3 Homing missile x6 Ninja Rope x4 Fast Walk x1 Bubble Trouble x2 Teleport x2 | Handgun x Inf Prod x Inf Bazooka x 5 Grenade x 5 Holy Hand Grenade x1 Ninja Rope x 3 Teleport x 1 |
| Plasma (Yellow) | robowurmz (Blue) | |
| Handgun x Inf Prod x Inf Bazooka x5 Grenade x9 Shotgun x1 Fire Punch x3 Mine x2 Dynamite x2 Air Strike x3 Homing missile x6 Ninja Rope x4 Fast Walk x1 Bubble Trouble x2 Teleport x2 | Handgun x Inf Prod x Inf Bazooka x 4 Grenade x 4 Dynamite x 2 Holy Hand Grenade x1 Ninja Rope x 2 Teleport x 1 |
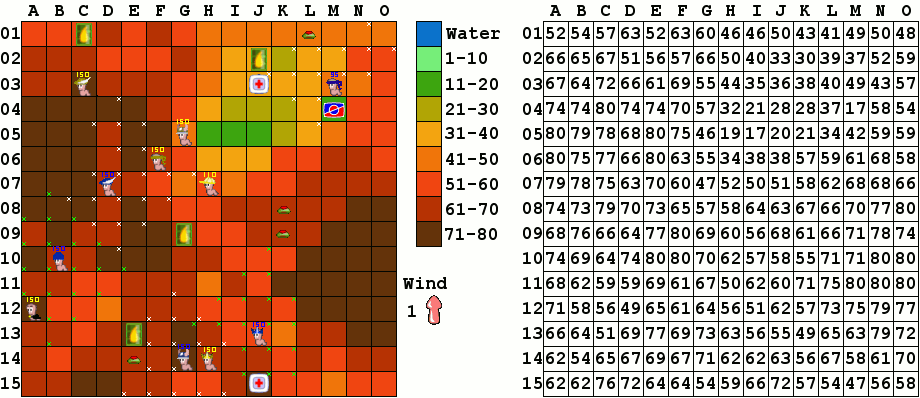
| Plasma (Yellow) | robowurmz (Blue) | |
| Handgun x Inf Prod x Inf Bazooka x3 Grenade x9 Shotgun x1 Fire Punch x3 Mine x2 Dynamite x1 Air Strike x3 Homing missile x6 Ninja Rope x4 Fast Walk x1 Bubble Trouble x2 Teleport x2 | Handgun x Inf Prod x Inf Bazooka x 4 Grenade x 4 Dynamite x 2 Ninja Rope x1 Teleport x 1 |
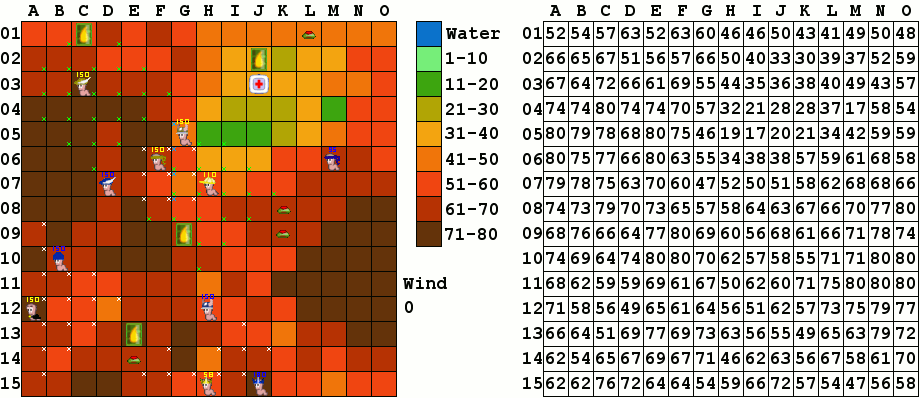
| Plasma (Yellow) | robowurmz (Blue) | |
| Handgun x Inf Prod x Inf Bazooka x3 Grenade x9 Shotgun x1 Fire Punch x2 Mine x2 Air Strike x3 Homing missile x6 Ninja Rope x4 Fast Walk x1 Bubble Trouble x2 Teleport x2 | Handgun x Inf Prod x Inf Bazooka x 4 Grenade x 3 Dynamite x 2 Holy Hand Grenade x1 Ninja Rope x 2 Teleport x 1 |

| Plasma (Yellow) | robowurmz (Blue) | |
| Handgun x Inf Prod x Inf Bazooka x3 Grenade x8 Shotgun x1 Fire Punch x3 Mine x2 Dynamite x1 Air Strike x2 Homing missile x5 Ninja Rope x3 Bubble Trouble x2 Teleport x2 | Handgun x Inf Prod x Inf Bazooka x 3 Grenade x 3 Dynamite x 2 Ninja Rope x2 |
| Plasma (Yellow) | robowurmz (Blue) | |
| Handgun x Inf Prod x Inf Bazooka x3 Grenade x8 Shotgun x1 Fire Punch x2 Mine x2 Dynamite x 1 Air Strike x2 Homing missile x5 Ninja Rope x3 Bubble Trouble x2 Teleport x2 | Handgun x Inf Prod x Inf Bazooka x 2 Grenade x 2 Dynamite x 2 Ninja Rope x 2 |

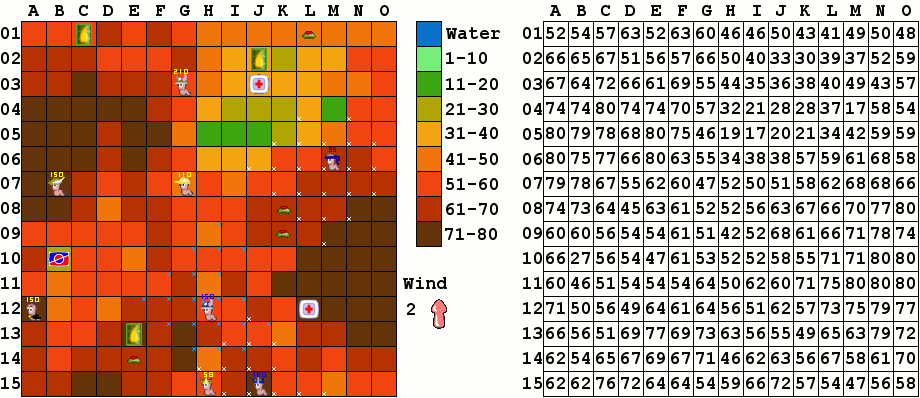
| Plasma (Yellow) | robowurmz (Blue) | |
| Handgun x Inf Prod x Inf Bazooka x3 Grenade x8 Shotgun x1 Fire Punch x3 Mine x2 Dynamite x1 Air Strike x2 Homing missile x2 Ninja Rope x3 Bubble Trouble x2 Teleport x2 | Handgun x Inf Prod x Inf Bazooka x 2 Grenade x 2 Ninja Rope x2 |